
How to Build a Rustic Farmhouse Coffee Table — coffee table, DIY furniture, farmhouse wood
☕ No More IKEA Clones: Let’s Build a Coffee Table That Actually Has Soul
Alright, guys.Ever wondered how to build a rustic farmhouse coffee table without selling your soul (or sanity) to overpriced furniture stores?
Well, grab your measuring tape and caffeine—because I’ve built this exact table, and trust me: nothing beats the feeling of sipping your morning brew at a coffee table you made with your own hands. IMO, it beats factory-assembled “furniture” by miles.
So let’s roll up those sleeves and talk DIY furniture, farmhouse wood, and why you don’t need a degree in carpentry to make this happen. 🙂
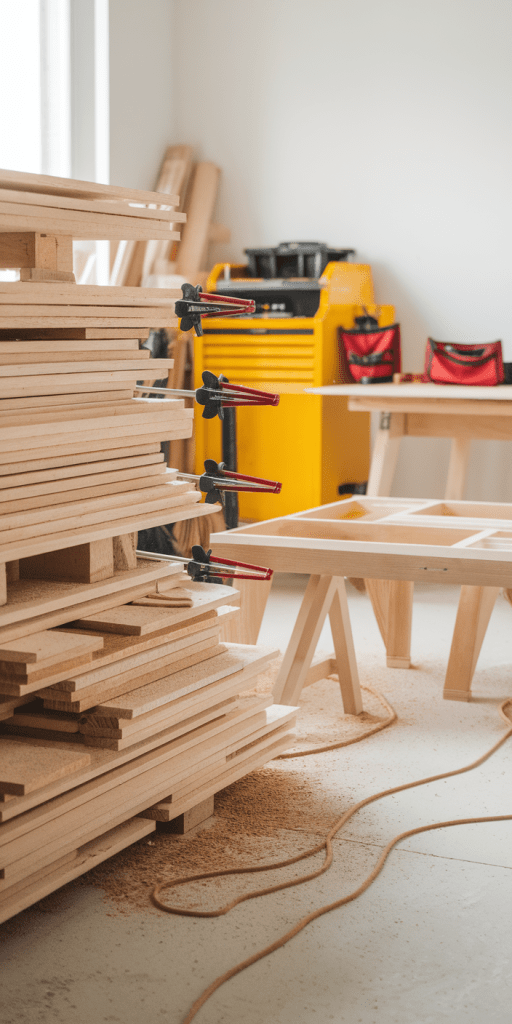
🧱 Materials You’ll Need: Keep It Rustic, Keep It Real

Here’s what I used (and what you probably have or can snag locally). Keep it simple, keep it raw.
🪵 Wood:
- Top boards: 2×6 or 2×8 planks (4–5 depending on table length)
- Apron and supports: 2x4s
- Legs: 4×4 posts for that chunky farmhouse charm
🔧 Tools:
- Power drill
- Circular saw or miter saw
- Orbital sander (or just plain elbow grease)
- Wood glue + screws
- Clamps
- Measuring tape
- Stain + polyurethane (optional but worth it)
🧰 Extras:
- Pocket hole jig (makes your life easier, trust me)
- L-brackets (for added support if you’re paranoid like me)
Bold takeaway: You can build this whole coffee table using standard DIY tools and inexpensive farmhouse wood from your local lumber yard or home improvement store.
✂️ Step-by-Step Instructions: Yes, You Can Totally Handle This

🧮 Step 1: Measure Twice, Cut Once (Unless You Like Drama)
I chose a final size of 48″ x 24″ for my table—perfect for a medium-sized living room and enough real estate to park coffee mugs, books, and failed sourdough attempts. Mark your cuts cleanly and keep your coffee table dimensions consistent.
Ever eyeballed a cut and ended up with a trapezoid? Don’t be me. Use a square.
🔗 Step 2: Build the Tabletop First
- Lay your 2×6 or 2×8 boards side by side.
- Use wood glue and clamps to hold them together.
- Reinforce with pocket holes or biscuit joints from the underside.
I used pocket screws. They don’t show, they hold like magic, and they made me feel mildly professional.
🧱 Step 3: Assemble the Apron + Support Frame
- Cut your 2x4s to fit the perimeter under the tabletop.
- Connect them to form a rectangle frame with the help of wood screws or a pocket hole jig.
- Add center supports if your table is longer than 4 feet.
FYI: That apron adds more than strength—it keeps your DIY furniture from wobbling like a toddler.
📐 Step 4: Attach the Legs
Here’s where the chunky 4×4 posts come in. You can go store-bought or salvage something rustic-looking (I used old fence posts—no joke).
- Screw the legs to the apron from the inside.
- Make sure they’re square and level—unless you want a coffee table with swagger (not the good kind).
🎨 Step 5: Sand Like You Mean It
Unless “splinter chic” is your vibe (:/), you need to sand this baby down until it’s smooth enough to rest your elbows on. I used 120-grit then followed up with 220 for a nice finish.
Sand with the grain. Always. That’s not negotiable.
🌲 Choose Your Finish: Make It Farmhouse Chic
Let’s talk coffee table aesthetics, shall we?
I went with a deep walnut stain for those “I reclaimed this wood from a 100-year-old barn” vibes. You can go lighter if your space needs brightening. Just pick a wood stain that makes your heart happy.
Finish it off with:
- 2 coats of stain (wipe off excess)
- 2–3 coats of polyurethane (matte or semi-gloss)
Let it dry. Seriously. Don’t rush this. Unless you like fingerprints and cat hair permanently embedded in your masterpiece.
💡 Pro Tips and Hacks From a Weekend Wood Warrior
🧠 Rhetorical truth bomb: Ever wonder why some DIY builds look flawless and others scream “I tried”?
Here’s why:
- Use clamps liberally. Clamps are like that friend who always shows up when you need help moving—super reliable.
- Pre-drill everything. Prevent splits and save your sanity.
- Double-check leg placement. There’s nothing cute about diagonal legs.
- Customize your top. Want a herringbone pattern? Do it. Want breadboard ends? Go nuts.
Key takeaway: Don’t fear customization. Your farmhouse wood coffee table deserves to reflect your style.
🎯 How This Project Stacks Up Against Store-Bought Coffee Tables

Let’s be honest. You could order a mass-produced coffee table right now. But here’s how your DIY furniture compares:
| Feature | DIY Farmhouse Table | Store-Bought Coffee Table |
| Personalization | ⭐⭐⭐⭐⭐ – You call the shots | ⭐ – You get what’s offered |
| Durability | ⭐⭐⭐⭐ – Real wood = real strength | ⭐⭐ – MDF? Meh. |
| Cost Efficiency | ⭐⭐⭐⭐ – Materials < $100 IMO | ⭐⭐ – Retail markup hits hard |
| Emotional Value | ⭐⭐⭐⭐⭐ – You built it. You admire it. | ⭐ – It arrives in a box. |
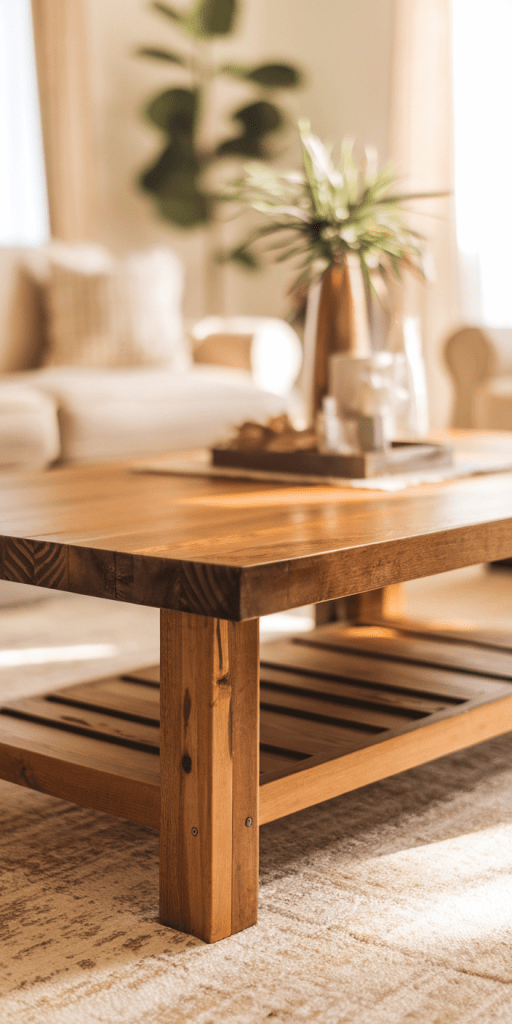
🛋️ How It Looks in My Living Room (Spoiler: Amazing)

So I dropped this beaut in the center of my living room last weekend. Paired it with a knit throw, a brass tray, and some dried eucalyptus I pretend to water.
Honestly? It elevated the whole room. Rustic meets cozy. Pinterest-worthy without being try-hard.
✨ Final Thoughts: Should You Build This Table? Heck Yes.
Let’s wrap this up.
If you:
- Want a weekend project that gives you lasting results
- Crave a living room piece that makes your friends say “Wait—you built that?”
- Enjoy the smell of sawdust and mild power tool adrenaline
Then yes—this DIY farmhouse coffee table is exactly what you need. Just don’t blame me when you want to build five more and redecorate your entire home around them.
FYI: The hardest part of this build? Resisting the urge to brag about it nonstop. 😎
Now go make something awesome—and send me a pic when you’re done. Seriously. I love that stuff.


